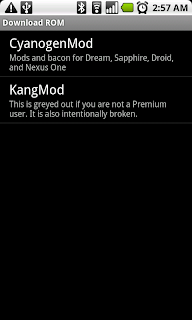
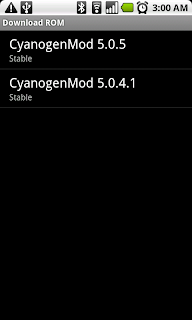
Showing posts with label Android. Show all posts

DeskSMS – Text From Anywhere!


desksms_feat_v5

commit 33cab5b004a5137947ae76e431d958cd3af91ae1
Author: Koushik Dutta <xxxxx@gmail.com>
Date:   Thu Jul 14 18:41:17 2011 -0700

    initial commit


Wednesday, July 13th, 2011, is the last night full night of sleep I have gotten in a while. On that day, I started hatching my newest app, DeskSMS. It was an idea I had been bouncing around for a year or so, but never executed for various reasons. There were a few competitors out at the time, but I was certain I could build a better product. And, I did. At least I think so. And the media seems to agree. Smile

unnamed

DeskSMS is an Android and iOS (jailbroken) app that forwards all your text messages and call history to your GTalk, GMail, or a convenient website and browser extension. It’s basically Google Voice, except with an open API, more delivery options, and minus the number porting inconvenience. One click setup, so even if you’re not tech savvy, you are up and running in 30 seconds.

During development, I’ve seen a lot of creative and funny uses for DeskSMS:

  1. A dispatcher uses it to communicate with all his trucks.
  2. A businessman left his phone at home while travelling abroad, and was still able to manage his texts.
  3. Pretend like you are working at work, when you are actually texting.

But mostly, it’s just an unbelievably convenient tool and time saver. Check it out on the Android Market!

Epic4G Bootstrap

Looking for an Epic4G kernel that has Clockwork Recovery and ROM Manager support built in? Several devs banded together to create a bootstrap for this device. In no particular order:
  • Tanimn: ext4 support (donate)
  • DRockstar: rfs/dual support (donate)
  • rjmjr: lending me a phone
You can support my work grab the kernel flasher off of the Android market for $2.99.
Or you can get it free from the download link here on my site.

Motorola XOOM Rooted

xoomroot

Since it’s another Google experience device, and ships with fastboot support (albeit, limited), it really does come rooted out of the box. Just needed to figure out the board kernel base, and compile up a new kernel.

Unfortunately the kernel was not available in the Android repositories. At first, I tried using the Harmony kernel, since they are both tegra 2 250 chips. That turned out to be major fail. As soon as I was about to give up, I noticed that AOSP had updated their tegra kernel repository with some new tasty branches for stingray. Kudos to these guys for being so on the ball! I was able to compile that up and get a working recovery to obtain root, and then get Superuser on the device.

I also built up a recovery, but due to a nonfunctional SD card slot (until they release a firmware update that enables the slot), nothing really works. That will come later.

Here are the instructions to root your device (this assumes you have adb and fastboot installed on your computer):

  1. # Download the XOOM root zip.
  2. # Unzip the package.
  3. # Put your junk in the box.
  4. adb reboot bootloader (skip the next 3 steps if you have already unlocked via fastboot)
  5. fastboot oem unlock
  6. # wait for reboot
  7. adb reboot bootloader
  8. fastboot flash boot rootboot.img
  9. fastboot reboot
  10. # wait for reboot
  11. adb remount
  12. adb push su /system/bin/
  13. adb shell ln –s /system/bin/su /system/xbin/su
  14. adb shell chmod 4755 /system/bin/su
  15. adb push Superuser.apk /system/app/

Yep, that should do it.

As I mentioned, I have a working recovery, but will not be releasing it until Google or I get the SD card working.

ROM Manager support will come as soon as that happens. But feel free to buy a Premium copy in advance. Winking smile

And hit me up on Twitter @koush!

PS. Stock boot image for XOOM.

More Progress on Writing Android Applications in Mono

Mono on Android: State of the Union

Having mostly finished up my surprisingly successful ROM Manager and ClockworkMod Recovery, I finally turned my attentions back to androidmono. Though Miguel recently announced the MonoDroid project, there's still room for a open source/hobbyist version. :) (And I need something to work on when I am bored)
When I put the project down a few months ago, I had very rough bindings to the Java API. I recently dumped the approach I took (albeit very cool), in favor of using jni4net. jni4net is a similar project that allows embedding a JVM into Microsoft's CLR, or vice versa. It only took a little bit of tweaking to make it work on Dalvik with Mono (I also hacked off a lot of unnecessary stuff that jni4net provides). So the following file:


Gives you this activity:

(Note: the code above is being displayed from my github repo and may change and leave the image out of date.)
I hacked up a Java/C# project to reflect on the Android SDK jar and create a C# android project that binds to the Java APIs via JNI. So, how it sort of works:
  • Create a class library and start coding up your services and activities.
  • Create a matching Java project (using the Android template as found on github) that uses the same namespace as your C# project.
  • Create "native" method stubs for all the overridden methods on your C#/Java doppleganger types. See here for an example.
  • The native methods get bound to the C# implementations at runtime automagically at runtime.

  • There's still a lot of work left to do: MonoDevelop template and plugin, a tool to create Java dopplegangers for each C# object via reflection, soft debugger support, translating Java's "OnSomeEvent" interfaces into true C# events/delegates, convenence extension methods, support for constructors (a Java constructor can not be "native"), and more. I wouldn't even say this is in Alpha stages yet, but it *works*.

    Adding Your ROM to ROM Manager

    Update: You can now host your ROM on ROM Manager's high speed server for free using ROM Manager Developer Portal! The following instructions are for advanced users that want fine tuned control over their ROM list, and want to utilize some of the advanced features. ROM Share will automatically host and setup your ROM for you in ROM Manager; all you need to do is upload the update.zip!


    First, you'll then want to get yourself listed in the list of developers in ROM Manager:

    To do that, create a JavaScript file that looks like this to describe where to find information about your ROMs:

    Make sure that the URL you provide for your ROM list above will not ever need to change. I don't like doing extra work! Send me that JavaScript you just created. I'll need to add it to the ROM Manager master manifest (which has the list of all the developers and their respective ROM list URLs) before it will show up in ROM Manager. The best way to send it to me is by opening an issue on ROMManagerManifest on Github. If you are super awesome, you can fork, edit the manifest, and send me a pull request. Do NOT email me your manifest.

    Now, you'll want to describe your list of ROMs that the user sees when they click you:

    To do that, you need to create another JavaScript file that will live at the URL you provided. It should look something like this:


    And that's it! Your ROM is now listed in ROM Manager!

    But, if you want to use the more advanced features of ROM Manager, such as download mirroring, and ROM customization, check out this manifest:


    Note that you can do cool things that install a sequence of installation zip files. "choices" makes a user choose between several zips (use a URL of "" for no action). Only one of those choices will be installed. You can also have multiple choice selections. And "addons" lets the user choose any number of additional zips to install. You can view my manifest for a full sample.

    Finally, to register your ROM for OTA updates, you need to edit your /system/build.prop in your ROM to include your Developer ID ro.modversion (as mentioned above) so ROM Manager can identify the version of your ROM. This is optional as well, but why not get OTA updates if it's just a couple lines of settings!

    ro.rommanager.developerid=cyanogen
    ro.modversion=CyanogenMod-5.0.5-Droid


    And that's it! Once you upload that file, your ROM will now be available to other Premium users! Good luck, and let me know if you encounter any bugs or need help!

    Klaxon 4.0 for Android

    Klaxon for Android has gone through another rigorous update! This time, I integrated the new Desk Clock from Eclair (Nexus One) into the application. The result is the customizability of Klaxon that users have come to love, with a brand spanking new and polished UI.

    For those of you curious how to get the Weather widget on your desk clock, Google “genie widget” for the third party application found on the Nexus One.

    deskclock alarms

    edit alarm

    Android.dll

    androidmono

    Picture above represents the results of 3 sleepless nights. No, I didn’t rewrite the Android framework. I generated a bunch of proxy classes to access them from Mono though. Rough idea of how it works:

    1. Java application reflects through Android framework SDK jar and outputs an XML file that represents the object model.
    2. C# application generates thousands of code files of said object model. (This is similar to jni4net, but that doesn’t work on anything but Windows).
    3. Tag all the methods with the [MethodImpl(MethodImplOptions.InternalCall)] attribute.
    4. Implement the method calls at runtime with a combination of dynamically created expression tree delegates and mono_add_internal_call.

    The class contents actually have no code, so the total dll size is pretty small (800k). Here’s what the LinearLayout “implementation” looks like:

    namespace android.widget 
    { 
        public class LinearLayout : android.view.ViewGroup
        { 
            public class LayoutParams : android.view.ViewGroup.MarginLayoutParams
            { 
                [global::System.Runtime.CompilerServices.MethodImpl(global::System.Runtime.CompilerServices.MethodImplOptions.InternalCall)] 
                public virtual extern java.lang.String debug(java.lang.String arg0); 
                [global::System.Runtime.CompilerServices.MethodImpl(global::System.Runtime.CompilerServices.MethodImplOptions.InternalCall)] 
                public extern LayoutParams(android.content.Context arg0, android.util.AttributeSet arg1); 
                [global::System.Runtime.CompilerServices.MethodImpl(global::System.Runtime.CompilerServices.MethodImplOptions.InternalCall)] 
                public extern LayoutParams(int arg0, int arg1); 
                [global::System.Runtime.CompilerServices.MethodImpl(global::System.Runtime.CompilerServices.MethodImplOptions.InternalCall)] 
                public extern LayoutParams(int arg0, int arg1, float arg2); 
                [global::System.Runtime.CompilerServices.MethodImpl(global::System.Runtime.CompilerServices.MethodImplOptions.InternalCall)] 
                public extern LayoutParams(android.view.ViewGroup.LayoutParams arg0); 
                [global::System.Runtime.CompilerServices.MethodImpl(global::System.Runtime.CompilerServices.MethodImplOptions.InternalCall)] 
                public extern LayoutParams(android.view.ViewGroup.MarginLayoutParams arg0); 
                [global::System.Runtime.CompilerServices.MethodImpl(global::System.Runtime.CompilerServices.MethodImplOptions.InternalCall)] 
                internal extern LayoutParams(); 
            } 
            [global::System.Runtime.CompilerServices.MethodImpl(global::System.Runtime.CompilerServices.MethodImplOptions.InternalCall)] 
            public virtual extern void setGravity(int arg0); 
            [global::System.Runtime.CompilerServices.MethodImpl(global::System.Runtime.CompilerServices.MethodImplOptions.InternalCall)] 
            protected override extern void onLayout(bool arg0, int arg1, int arg2, int arg3, int arg4); 
            [global::System.Runtime.CompilerServices.MethodImpl(global::System.Runtime.CompilerServices.MethodImplOptions.InternalCall)] 
            public override extern int getBaseline(); 
            [global::System.Runtime.CompilerServices.MethodImpl(global::System.Runtime.CompilerServices.MethodImplOptions.InternalCall)] 
            protected override extern void onMeasure(int arg0, int arg1); 
            [global::System.Runtime.CompilerServices.MethodImpl(global::System.Runtime.CompilerServices.MethodImplOptions.InternalCall)] 
            protected override extern bool checkLayoutParams(android.view.ViewGroup.LayoutParams arg0); 
            [global::System.Runtime.CompilerServices.MethodImpl(global::System.Runtime.CompilerServices.MethodImplOptions.InternalCall)] 
            public virtual extern new android.widget.LinearLayout.LayoutParams generateLayoutParams(android.util.AttributeSet arg0); 
            [global::System.Runtime.CompilerServices.MethodImpl(global::System.Runtime.CompilerServices.MethodImplOptions.InternalCall)] 
            protected virtual extern new android.widget.LinearLayout.LayoutParams generateLayoutParams(android.view.ViewGroup.LayoutParams arg0); 
            [global::System.Runtime.CompilerServices.MethodImpl(global::System.Runtime.CompilerServices.MethodImplOptions.InternalCall)] 
            protected virtual extern new android.widget.LinearLayout.LayoutParams generateDefaultLayoutParams(); 
            [global::System.Runtime.CompilerServices.MethodImpl(global::System.Runtime.CompilerServices.MethodImplOptions.InternalCall)] 
            public virtual extern bool isBaselineAligned(); 
            [global::System.Runtime.CompilerServices.MethodImpl(global::System.Runtime.CompilerServices.MethodImplOptions.InternalCall)] 
            public virtual extern void setBaselineAligned(bool arg0); 
            [global::System.Runtime.CompilerServices.MethodImpl(global::System.Runtime.CompilerServices.MethodImplOptions.InternalCall)] 
            public virtual extern int getBaselineAlignedChildIndex(); 
            [global::System.Runtime.CompilerServices.MethodImpl(global::System.Runtime.CompilerServices.MethodImplOptions.InternalCall)] 
            public virtual extern void setBaselineAlignedChildIndex(int arg0); 
            [global::System.Runtime.CompilerServices.MethodImpl(global::System.Runtime.CompilerServices.MethodImplOptions.InternalCall)] 
            public virtual extern float getWeightSum(); 
            [global::System.Runtime.CompilerServices.MethodImpl(global::System.Runtime.CompilerServices.MethodImplOptions.InternalCall)] 
            public virtual extern void setWeightSum(float arg0); 
            [global::System.Runtime.CompilerServices.MethodImpl(global::System.Runtime.CompilerServices.MethodImplOptions.InternalCall)] 
            public virtual extern void setOrientation(int arg0); 
            [global::System.Runtime.CompilerServices.MethodImpl(global::System.Runtime.CompilerServices.MethodImplOptions.InternalCall)] 
            public virtual extern int getOrientation(); 
            [global::System.Runtime.CompilerServices.MethodImpl(global::System.Runtime.CompilerServices.MethodImplOptions.InternalCall)] 
            public virtual extern void setHorizontalGravity(int arg0); 
            [global::System.Runtime.CompilerServices.MethodImpl(global::System.Runtime.CompilerServices.MethodImplOptions.InternalCall)] 
            public virtual extern void setVerticalGravity(int arg0); 
            [global::System.Runtime.CompilerServices.MethodImpl(global::System.Runtime.CompilerServices.MethodImplOptions.InternalCall)] 
            public extern LinearLayout(android.content.Context arg0, android.util.AttributeSet arg1); 
            [global::System.Runtime.CompilerServices.MethodImpl(global::System.Runtime.CompilerServices.MethodImplOptions.InternalCall)] 
            public extern LinearLayout(android.content.Context arg0); 
            [global::System.Runtime.CompilerServices.MethodImpl(global::System.Runtime.CompilerServices.MethodImplOptions.InternalCall)] 
            internal extern LinearLayout(); 
        } 
    } 

    A year of on and off hacking coming to fruition soon…

    Building Mono using the Android NDK

    I finally got around to looking at the Android NDK yesterday. It is basically a subset of the Android Source build environment, but it has all the bits necessary to compile Mono. It only took a bit of finagling with the Android.mk to make everything work right. Building for Android is pretty easy now; the longest part is actually downloading and building the mcs assemblies. There’s a script to handle that though.

    The androidmono repository has updated instructions.

    Developing and Debugging .NET applications on Android with Mono(Develop)

    Lots of cool stuff has been happening in Mono recently! First MonoTouch was released, which allows the development of iPhone applications in C#/MonoDevelop. The catch was that there was no debugger support. To address this glaring problem, Mono released created and released a Soft-Mode Debugger, which is basically an in-process debugger that lives in the runtime. After peeking at the code, I realized that porting this to make it work on Android would be a cinch! The result: you can now create a console application in MonoDevelop, deploy it to an Android emulator or device, and debug:

    md-android


    I blogged a while ago that I was working on an interop layer for Mono to allow it to utilize the Android SDK. This is mostly complete. Once I write up a tool to generate convenient wrapper classes, writing full blown applications for Android will become a reality!

    Build Configuration for the HTC Magic

    MyTouchWhite

    A few days ago, I released build scripts that would allow developers to make images that target the T-Mobile MyTouch. I finally got a hold of a regular Magic (a Sapphire 32A) and have created a corresponding project to support building for this device. So, this will now work:

    . build/envsetup.sh
    lunch htc_magic-eng
    make

    Please note the instructions regarding cherry-picking certain changes from Donut into your Android repository. The Sapphire 32A uses HTC’s kernel offsets in the boot.img, and not Google’s. Without those changes, your phone will not boot.

    Build Configuration for the T-Mobile MyTouch

    MyTouchWhite

    The HTC Dream is the only supported Android development device. But, it is possible to do development on other devices, by cannibalizing the various drivers that you can find on them. This usually involves modifying/repacking an official update.zip. However, with a little work, it is possible to use the Android build system to create legitimate fastboot images!

    After following the instructions to retrieve the MyTouch build configuration and extracting the proprietary bits from a running device, you can do the following to build images for the MyTouch:

    . build/envsetup.sh
    lunch htc_mytouch-eng
    make

    There is also a mkupdatezip script available in the Downloads section of the repository to assist in creating update.zip files as well!

    The images will then be found in out/target/product/mytouch-open. A build configuration for the Magic will be coming soon! (It is the same board as the MyTouch, a Sapphire, but different enough to need a separate config.)

    Note:

    The general process in creating this board makefile was basically the following:

    1. Start with the Dream build config (dream-open).
    2. Extract the kernel from a running device and replace it.
    3. Modify the extract-files.sh script to adb pull the correct proprietary files.
    4. Modify the .mk files to reference the proper proprietary files.
    5. Grab the wlan.ko off the device and replace the one at the repository root.

    Android’s Linker makes Baby Jesus Cry

    release-1.0 branch:

    static int open_library(const char *name)
    {
    int fd;
    char buf[512];
    const char **path;

    TRACE("[ %5d opening %s ]\n", pid, name);

    if(strlen(name) > 256) return -1;
    if(name == 0) return -1;

    fd = open(name, O_RDONLY);
    if(fd != -1) return fd;

    for(path = sopaths; *path; path++){
    sprintf(buf,"%s/%s", *path, name);
    fd = open(buf, O_RDONLY);
    if(fd != -1) return fd;
    }

    return -1;
    }

    cupcake branch:

    /* TODO: Need to add support for initializing the so search path with
    * LD_LIBRARY_PATH env variable for non-setuid programs. */
    static int open_library(const char *name)
    {
    int fd;
    char buf[512];
    const char **path;

    TRACE("[ %5d opening %s ]\n", pid, name);

    if(name == 0) return -1;
    if(strlen(name) > 256) return -1;

    if ((name[0] == '/') && ((fd = _open_lib(name)) >= 0))
    return fd;

    for (path = sopaths; *path; path++) {
    snprintf(buf, sizeof(buf), "%s/%s", *path, name);
    if ((fd = _open_lib(buf)) >= 0)
    return fd;
    }

    return -1;
    }

    Summary: Android’s linker used to look in the current working directory to resolve library references. Now it doesn’t. (And it never used LD_LIBRARY_PATH at all) This is really only annoying for 3rd party command line applications which have references to libraries that aren’t part of the standard Android build (and contained in /system/lib). I need to figure out how to make gcc, et al, create binaries that store the full path to the libraries they reference, rather than just the base file name...

    Edit: I tried patching it to use LD_LIBRARY_PATH, but calling getenv from within the linker would always return NULL. Not sure why. So I did the next best thing and added “.” to the list of search paths. I think that is default behavior anyways on other Linux based systems (will verify later). Submitted the change, hope it gets accepted.

    Have Your Cupcake and Eat It Too

    untitled

    Google released the Android 1.5 SDK today. They also pushed their internal Cupcake branch upstream to the main Android project! I sync’d up my repository and started the build. I ran into an issue with lib0mxCore.so not being found, so I patched the build process to pull it off the device. I’m not sure if that is the right solution; but it builds and runs!

    The immediate differences I noticed: the UI scheme has changed significantly. It looks considerably better than before. The soft keyboard seems to be out of the prototype stages and is fairly usable as well.

    Click here for a zip file containing the Cupcake images. I recommend also downloading the cupcake scripts I wrote up to flash to a phone or run in an emulator.

    To flash to a phone using my scripts on a Windows system, extract both zip files into the same directory and simply run while your phone is in fastboot mode [0]:

    flash.bat

    To run the emulator, you must have the Android SDK:

    emulator.bat

    The directions are similar for Mac/Linux (flash-mac.sh, flash-linux.sh)

    [0] To start up in fastboot mode, you must have a rooted/dev phone and the engineering bootloader. Turn your phone off, hold camera, and press power. Then connect your phone to you computer and press the Back button.

    Klaxon for Android – Now a Paid Application on the Market

    The new improved Klaxon is now available on the Market for a reasonable $1.99! There have been several bug fixes, as well as some new features:

    • The compass is used to detect flip events. This allows vibration to be used for the alarm as well (it previously used to mess with the accelerometer, making it unusable).
    • Alarms can now optionally vibrate.
    • Alarms are now nameable.
    • Snooze can now be disabled.
    • Alarm will now turn off if the Home button is pressed.
    • Click and hold an alarm on the main screen to delete it.

    JNI in Android (and a foreword of why JNI Sucks)

    wall-smaller

    Quick Preface: You do NOT need root to create and use a shared native library (.so) in Android from your Java application.

    I had never tried Java Native Interface until today. And I must say, it completely sucks. Not only is the header generation/implementation nontrivial and tedious, JNI is inherently broken in that it is not architecture/platform nonspecific. So I proudly present to you my list of why JNI sucks.

    • You can't access arbitrary functions in arbitrary DLLs. JNI requires that you write a glue C/C++ layer to do whatever you want to do natively.
    • On Android, your glue layer must contain a JNI_OnLoad function that explicitly register every method that needs to be made available to the JVM. The JVM can't simply check the export tables and intelligently import it.
    • Since developers must write a glue layer, you must also compile and package that glue layer per platform you are targeting. This design is absurd because platforms can have different CPU architectures and different Operating Systems, and still support similar calls in the similar libraries. For example:
      • OpenGL ES (libGLES_CM). On Windows Mobile it is called libGLES_CM.dll. On Linux/Android it is called libGLES_CM.so. These libraries have the same "undecorated" library name, and also contain the same functions with the same signatures. Unfortunately due to how how terrible an implementation JNI is, the same Java application would not work on every platform.
      • Standard System Libraries on Linux or Windows (libc, libdl, libm, ole32, kernel32, etc) - Once again, need to compile libraries per architecture (ARM, x86, x64, MIPS, etc) to use the common/base functions that would be available on the platform (GetWindowEx, statfs, etc).
    • Write once, run anywhere. (Given that you are willing to do multiple cross compiles and embed multiple native binaries into a single package and unpack the appropriate one at runtime.)

    For amusement's sake, let's look at what a C# PInvoke looks like versus JNI on Android. Suppose we want to clear the screen in OpenGL:

    C#:

    Just declare the method signature and the DLL. Simple! Call that like any other method in C#. (Note that the managed executable generated by this code works on both Android or Windows Mobile. Yes, I tested it.)

    [DllImportAttribute("libGLES_CM")]
    public static extern void glClearColor(float red, float green, float blue, float alpha);

    JNI? Let's start out by declaring it.

    public static native void glClearColor(float red, float green, float blue, float alpha);

    Not done yet! Now the fun begins. Drop to a command prompt and go to the bin directory of your project: javah com.koushikdutta.JNITest.JNITestAcitivity. Now we have a generated header file, com_koushikdutta_jnitest_JNITestActivity.h, that looks like this:

    /* DO NOT EDIT THIS FILE - it is machine generated */
    #include <jni.h>
    /* Header for class com_koushikdutta_jnitest_JNITestActivity */
    
    #ifndef _Included_com_koushikdutta_jnitest_JNITestActivity
    #define _Included_com_koushikdutta_jnitest_JNITestActivity
    #ifdef __cplusplus
    extern "C" {
    #endif
    /*
     * Class:     com_koushikdutta_jnitest_JNITestActivity
     * Method:    glClearColor
     * Signature: (FFFF)V
     */
    JNIEXPORT void JNICALL Java_com_koushikdutta_jnitest_JNITestActivity_glClearColor
      (JNIEnv *, jclass, jfloat, jfloat, jfloat, jfloat);
    
    #ifdef __cplusplus
    }
    #endif
    #endif
    

    Ok, now let's implement the C code:

    #include <GLES/gl.h>
    
    JNIEXPORT void JNICALL Java_com_koushikdutta_jnitest_JNITestActivity_glClearColor
      (JNIEnv * env, jclass clazz, jfloat r, jfloat g, jfloat b, jfloat a)
    {
        glClearColor(r, g, b, a);
    }

    You probably thought you were done, didn't you? Sun thinks otherwise. You need to register the function in C code as well. Don't screw up when copy pasting the cryptic method signature strings!

    static JNINativeMethod sMethods[] = {
         /* name, signature, funcPtr */
    
        {"glClearColor", "(FFFF)V", (void*)Java_com_koushikdutta_jnitest_JNITestActivity_glClearColor},
    };
    
    extern "C" jint JNI_OnLoad(JavaVM* vm, void* reserved)
    {
        JNIEnv* env = NULL;
        jint result = -1;
    
        if (vm->GetEnv((void**) &env, JNI_VERSION_1_4) != JNI_OK) {
            return result;
        }
    
        jniRegisterNativeMethods(env, "com/koushikdutta/JNITest/JNITestActivity", sMethods, 1);
        return JNI_VERSION_1_4;
    }

    To be completely fair, jniRegisterNativeMethods is actually a convenience function that is found in libnativehelper.so on Android; I imported that library for the sake of... convenience. Its implementation is as follows (JNIHelp.c in the source):

    int jniRegisterNativeMethods(JNIEnv* env, const char* className,
        const JNINativeMethod* gMethods, int numMethods)
    {
        jclass clazz;
    
        LOGV("Registering %s natives\n", className);
        clazz = (*env)->FindClass(env, className);
        if (clazz == NULL) {
            LOGE("Native registration unable to find class '%s'\n", className);
            return -1;
        }
        if ((*env)->RegisterNatives(env, clazz, gMethods, numMethods) < 0) {
            LOGE("RegisterNatives failed for '%s'\n", className);
            return -1;
        }
        return 0;
    }

    You need to load the library in Java code in your class's static constructor.

    System.load("/data/data/com.koushikdutta.JNITest/libjnitest.so");

    On Android, you must use System.load and provide a full path instead of using System.loadLibrary. This is because loadLibrary only checks /system/lib; it does not search LD_LIBRARY_PATH or your current working directory. Unfortunately, applications can't write to the /system/lib directory (without root).

    .NET's P/Invoke is so much easier/better that a third party company (God forbid Sun actually do something to better the Java language) implemented something quite similar for Java, named, *drumroll please*, J/Invoke. Too bad Android doesn't have that. That would be nice.

    Also, on Android, you can't do a normal ARM/GCC cross compile to make shared libraries (I've discussed this in a previous blog post). The resultant .so files will not work with Android's linker due to different linker scripts. To create shared libraries for Android, I would highly recommend just creating a subproject in the Android Source code tree and building the tree. Alternatively you can use the handy script found on this page.

    Also, remember that the shared library will need to be contained in your APK file and extracted to the file system so it can be accessed. For an example of how that can be done, check out the source code that does something very similar in the Android Mono port.

    Incidentally, this learning experience came about as a result of figuring out how to run Mono side by side with Java/Dalvik in the same process.

    Compiling Mono under the Android Build Evironment

    I mentioned previously that I got Mono compiling under the Android build environment. I have also submitted all the changes I made to Mono back to their team. In addition, all external changes are hosted on Google code. The external changes were filling holes in Bionic, setting up a config.h that works on Android, and converting the Makefile to an Android.mk. Click here to go to the AndroidMono repository.

    The build instructions are straightforward, and assumes you have a Release 1.0 repository (not Master or Cupcake) already set up:

    • In a shell, go to your mydroid/external directory and type:
    • Apply the androidmono.patch file to the mono directory make the necessary changes to the mono project. (This won't be necessary once they accept my patch)
    • Run make in your mydroid directory.

    Now you should have a mono and libmono.so! The build process does not create the managed assemblies. That needs to still be done the old fashioned configure/make way. The resultant mono binary will look for the managed assembles in /data/data/com.koushikdutta.mono/assets/lib/mono/2.0/(mscorlib.dll).

    Mono and Bionic Together At Last

    I finally got Mono building in the Android build environment (I.e., a project located at mydroid\external\mono). The great part about this is that I am now doing cross compiles to build the project, as opposed to an ARM native build on the emulator; those were painfully slow. Converting Makefiles to Android.mk files was pretty tedious, but that didn't compare to the significant differences between glibc and Bionic (Android's libc implementation). When Google said Bionic was "lightweight", they weren't joking. For example, Bionic does not implement div. Seriously? (However, the cupcake branch seems to have it now)

    Regardless, I have Hello World working linked to Bionic now, which is quite exciting. I also tried out some PInvokes on libGLES_CM.so (OpenGL ES), and the initialization function eglGetDisplay was working just fine. So things are looking good, and this project should be able to really start taking off now.

    Edit:

    Mono on Bionic is around 50% faster... check my original Mono vs Dalvik post for updated performance comparisons. I am guessing the speed increase is due to Bionic being compiled for the Thumb instruction set as opposed to ARM. Or maybe because Google is using some CPU/architecture specific compiler optimizations in their build process.

    Android's Linker

    "Next task: create a JNI lib that can access Mono... should be fairly easy." Famous last words. I guess I didn't think through the problem of Android using a non-standard linker. Not only is it named and located differently (/system/bin/linker as opposed to ld-linux.so.3), the format of the dynamic libraries it loads is also different as well. So, Android's linker can not load Linux .so files, and vice versa.

    This basically means that Mono with its current build configuration can not interact with the Android system at all, other than through RPC. And while it certainly is possible[0] to do that (and Android uses RPC extensively), I feel that would be a clumsy solution, as my goal is to get Mono running side by side with Java/Dalvik, and allow seamless interaction with runtime through usage of Dynamic Language Runtime (I'm not sure if Mono supports the "dynamic" keyword/type yet, but when it does... this will be quite amazing).

    There are two possible solutions to this:

    • Recompile Mono and the glibc dependencies using the linker script for Android.
    • Compile Mono within the Android build environment so it uses Bionic instead of libc.

    Using Crosstool, I tried to build a new toolchain tailored for Android's linker. I quickly found that whoever set up the toolchain/glibc build process must be a sadist. I wasn't too hesitant to give up on this approach anyway: this would result in two copies of libc being loaded (if that is even possible).

    Although getting Mono fully integrated to work with Android's libraries will take considerably longer, I can rest knowing it is the proper solution.

    [0] Set up an RPC server for OpenGL ES or skia? Ugh...

    Mono for Android - First Update

    I mentioned in my previous post that Mono was displaying assertions and exceptions on run when not being under the Debian environment. I have resolved these issues by tweaking a few variables on configure, and one by patching mono/metadata/security.c.

    I am also now building Mono from the trunk (instead of 2.0.1) and using eglib instead of glib. Here's what I run to build Mono (still done on the emulator, under Debian):

    export 'CFLAGS=-DARM_FPU_NONE -DPLATFORM_ANDROID -Wl,-rpath,.,-rpath,/data/data/com.koushikdutta.mono/assets/lib,--dynamic-linker,/data/data/com.koushikdutta.mono/assets/lib/ld-linux.so.3'

    export CPPFLAGS=$CFLAGS

    export 'LDFLAGS=-Wl,-rpath,.,-rpath,/data/data/com.koushikdutta.mono/assets/lib,--dynamic-linker,/data/data/com.koushikdutta.mono/assets/lib/ld-linux.so.3'

    ./configure --disable-mcs-build --with-tls=pthread --disable-shared-handles --with-static_mono=no --with-glib=embedded --prefix=/data/data/com.koushikdutta.mono/assets --exec-prefix=/data/data/com.koushikdutta.mono/assets

    make

    However, "make" fails while building docs. That is ignorable though. I actually comment out docs in my Makefile, as I haven't looked into how to disable it during configure.

    With this setup, the base mono installation directory is /data/data/com.koushikdutta.mono/assets (instead of /usr/local). The binaries, libraries, and assemblies should be placed in their usual relative locations: ie, mono binary should be in bin, the libraries in lib, etc.

    Now, if you were to run "./mono test.exe" from a terminal, you will see a lengthy assertion. This is because Mono is failing to find the user's home directory, because Android does not set that environment variable. And thus Mono doesn't have a valid location for the ~/.wapi/ directory. The ".wapi" directory is used by Mono for some transient files and communication (from what I understand). For example, if you were to run Mono under Terminal Emulator, HOME needs to be a location the Terminal emulator process and uid has full read/write permissions: /data/data/com.android.term:

    export HOME=/data/data/com.android.term

    ./mono test.exe

    I have updated the APK on the Market with my latest changes. I also have the APK available for direct download.

    Next task: create a JNI lib that can access Mono... should be fairly easy. (Calling into the lib will automatically set the HOME directory for you as well)